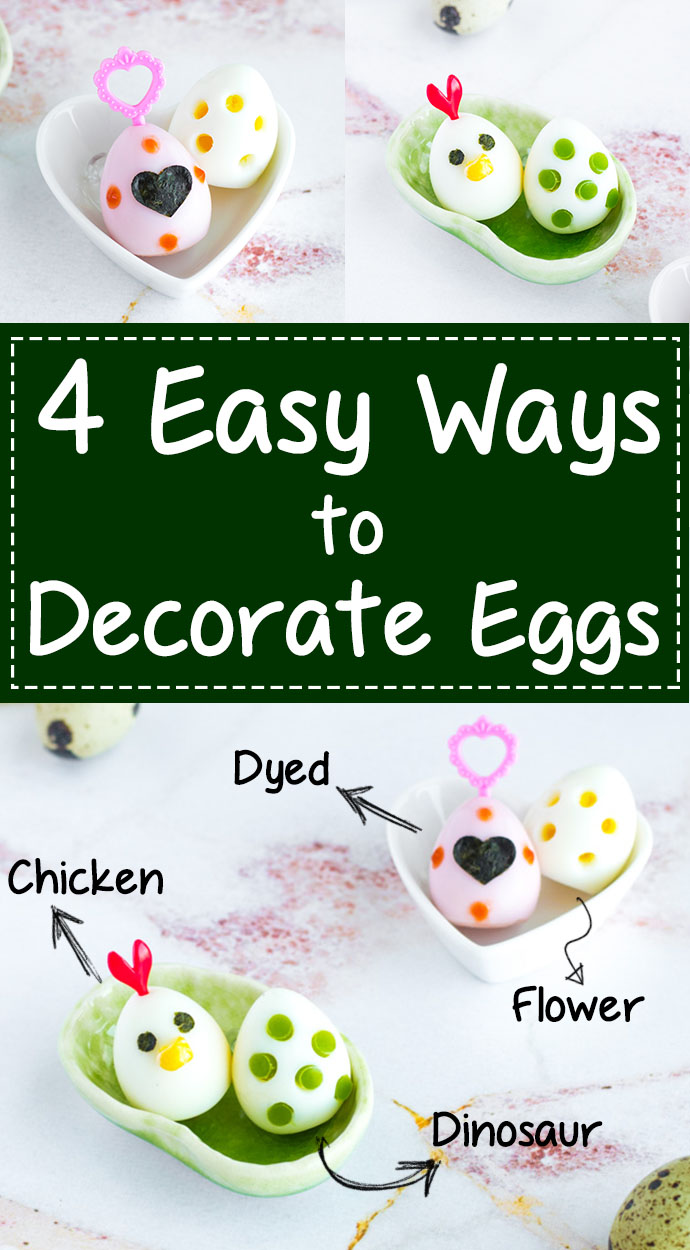
Up your hard-boiled egg game with these 4 easy & adorable ways to decorate eggs.
An excellent addition to any bento box, eggs are a great way to add some extra protein to your lunch and fill up empty stomachs. But, let’s be real here: plain, hard-boiled eggs aren’t all that exciting. I’m talking about whole hard-boiled eggs, which just look like awkward white masses when placed inside a bento box. One way to overcome this is by cutting the egg in halves, slices, or wedges – all perfectly feasible choices, and great for adding to more traditional bento boxes. But what if you want something a little bit cuter, a little bit fancier, for that adorable bento box you just prepared?
Thankfully, there are some really easy ways to amplify an egg’s cuteness factor (and you don’t even need to cut it up!). Say goodbye to boring white blobs, and hello to 4 easy, super cute ways to decorate your hard-boiled eggs.
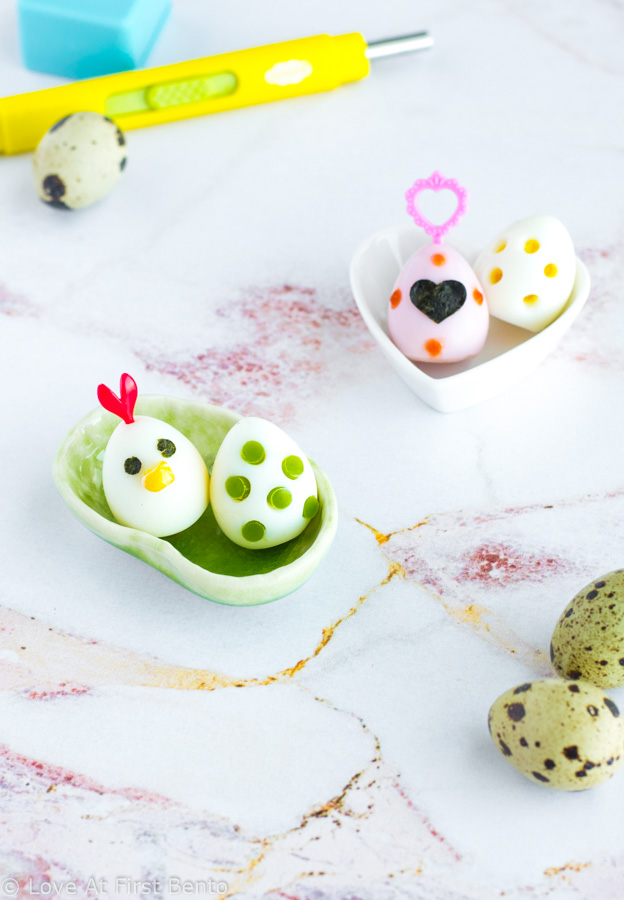
Note: I used quail eggs in the pictures and video, but these design methods would work equally as well with chicken eggs.
Watch how to decorate eggs 4 ways (50 sec):
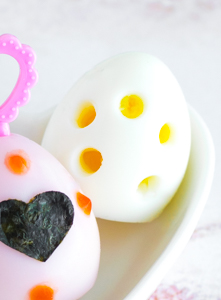
Design #1: Dyed Eggs
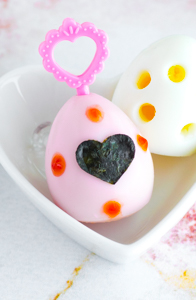
Colored eggs aren’t just for Easter, people. You can make beautiful pastel-colored eggs that are 100% naturally colored by following this easy method:
- Add warm water to a drinking glass or small bowl (enough to cover the egg). I like using drinking glasses, because the egg stays fully submerged in the dye liquid, resulting in even coloration. If you’re dying quail eggs, shot glasses work perfectly for this!
- Add about 1/8 – 1/4 teaspoon of your natural dye (suggestions below) to the water, and mix until fully dissolved. Add more dye if necessary.
- Add your egg to the dye mixture, and let sit for a minimum of 15 minutes. You can allow it to sit for longer (a few hours – overnight) if you want a darker colored egg.
I strive to keep all of my bento decorating methods 100% natural, and that includes any dyes I use to color my food. Sorted by color, here are some natural powders and liquids you can use to dye your hard-boiled eggs:
- Red/Pink: beet powder, hibiscus powder
- Orange: carrot powder
- Yellow: turmeric, curry powder
- Green: matcha, spinach powder, spirulina, chlorella powder
- Blue: butterfly pea flower powder
- Purple: purple potato powder, water from boiling red cabbage
- Brown: soy sauce (use in place of the water in Step 1, and omit Step 2)
- Grey/Black: charcoal powder
If you want all colors of the rainbow at your fingertips, then I highly recommend this 100% natural, organic food dye kit – it comes with every color you need! I always use these dyes to color my food, as they produce beautifully rich, vibrant colors every time.
Once you’ve dyed your egg, you can add it to your bento box as is, or you can use it as a base for any of the other decorating methods listed below. I decided to decorate my pretty pink egg with a nori heart, a few little “jewels” of ketchup, and a heart pick at the top. Feel free to add all sorts of nori cut outs to your colored egg!
Design #2: Dinosaur Eggs
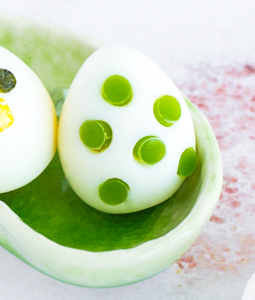
These cute little guys make the perfect addition to any prehistorically-themed bento box, or can be used as a nice way to add a pop of color to an otherwise drab lunch. All it takes is 3 easy steps:
- Using a drinking straw or cutting tool, make little circle cutouts from veggie, ham, or cheese.
- Using a straw or cutting tool, make little circle cutouts all around your egg. You don’t have to push your cutter all the way into the egg – push until you feel it break past the egg white portion, then remove.
- Using tweezers or chopsticks, insert your veggie/ham/cheese circles into the circle openings on your egg. Make sure you have enough!
Here are some ideas for different foods you can use to create your colored spots:
- Red: red pepper, red portion of imitation crab stick
- Orange: carrot, orange cheese, orange pepper, yam
- Yellow: yellow pepper
- Green: green pepper, sugar snap peas
- Purple: purple potato, red cabbage
- Pink: ham
I absolutely LOVE using this cutting tool when I’m making my dinosaur eggs (as well as for many other bento applications), but you can definitely use a straw to make your circle cutouts; just cut it down to a 1-inch length. Keep in mind that, with a straw, it can only cut out soft items (not hard vegetables like peppers).
See how dinosaur eggs were used in this Pusheenosaurus bento box.
Design #3: Flower Eggs
This is a really easy way to add a simple touch of elegance to any bento box. And the best part is, all you need is a straw!
- Using a straw or cutting tool, make 5 – 6 little circle cutouts on one side of your egg. To make the flower shape, aim your cutouts to be along the path of a circle.
This method would also look great with a dyed egg, or with a fancy food pick inserted at the top. Or, just keep it as is, like I did!
Design #4: Chicken Eggs
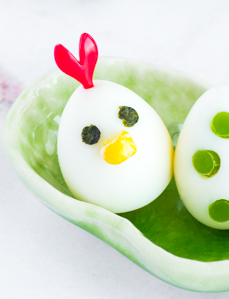
Literally, an egg that looks like a chicken! (Oh, the irony.) This is one of the easiest animal egg designs – we’ll tackle how to make more animal kingdom egg friends in future tutorials. For now, master the chicken egg by following these simple steps:
- Using a circle or any kind of face nori punch, cut out 2 circles from nori for the chicken’s eyes. Apply to the egg using tweezers. ALTERNATIVE: Use black sesame seeds instead of nori (dip in a little mayo or honey to help them stick).
- To make the beak, take a single corn kernel (I used frozen), and poke a small piece of uncooked spaghetti into the back of it (the spaghetti only needs to be about the size of a fingernail). Push the corn into the egg like a thumbtack. (The uncooked spaghetti will soften up from the moisture by lunch time.)
- Take a red or pink heart-shaped food pick and insert it into the top of the egg – this will be the chicken’s comb.
Who doesn’t want cute little egg chickens in their bento box? These guys are the perfect way to make any bento box look adorably fancy, and with minimal effort.
So, the next time you feel like your bento box needs an extra little something, try adding one of these cute egg designs. They’re simple to master, and offer impressive results, making this a total win-win!

![Vulpix Pikachu Bento Box - Pokemon fans will FLIP over this insanely adorable Pokemon bento, which features Pikachu dressed up as a Vulpix! 100% edible & perfect for decorating rice, this bento can easily be created by anyone thanks to my 'secret hack' for easily & accurately creating images out of food. Get the recipe at: loveatfirstbento.com [character bento, kyaraben, lunch]](https://loveatfirstbento.com/wp-content/uploads/2018/12/Vulpix-Pikachu-Bento-2-370x240.jpg?x21322)

Comments (4)
Wow they look amazing!
Thanks so much! 😀
Those are the cutest eggs I have ever seen. Cant wait to try this for my daughter.
Thanks Shannon!
Thank you! I’m sure your daughter will love them 😀