Description
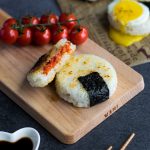
Toasty golden rice, sweet roasted tomatoes, and a perfectly runny fried egg make this grilled rice ball 100% irresistible! Made using a circular measuring cup, anyone can easily recreate this indulgent lunchtime treat – no fancy tools or molds required! {Vegetarian}
Ingredients
Food Items:
- 2 cups cooked Japanese short-grain rice
- Neutral flavored cooking oil
- Nori seaweed (optional)
- 4 – 5 fried eggs (optional)
Roasted Tomato Filling:
- 1 cup cherry or grape tomatoes, halved
- 1 clove garlic, minced
- Olive oil
- Salt & pepper
Recommended Tools:
- Circular measuring cup or ramekin (I used a 1 cup measuring cup)
- Plastic wrap
Instructions
Roasted Tomato Filling:
- Preheat your oven to 375°F (190°C).
- In a bowl, mix sliced cherry tomatoes with the garlic and enough olive oil to coat. Season generously with salt and pepper, and give another mix until all tomatoes are evenly coated in oil and seasoning.
- Spread tomatoes onto a baking sheet lined with parchment paper, and bake in the oven for around 20 minutes. You’ll know they’re done once the tomatoes become very fragrant and golden around the edges.
- Optional: Once cool, roughly chop the roasted cherry tomatoes.
Assembly:
- With a damp paper towel, wipe the inside of your measuring cup until it’s completely damp (alternatively, you could spray it with a little non-stick spray). Fill the measuring cup with warm rice, until you can no longer see the bottom. Use the back of a rice paddle or spoon to flatten the rice, making sure to press the rice into all the crevices.
- Take a generous spoonful of roasted cherry tomatoes and spread them on top of the flattened rice in the measuring cup, leaving a little bit of space around the edges.
- Add more warm rice on top of the cherry tomato filling, and spread and flatten it out with the back of a rice paddle or spoon, until the filling is no longer visible and the rice is perfectly flat on top. If you are using a 1 cup measuring cup, the entire onigiri should not exceed the 1/2 cup point.
- Flip the measuring cup over, making sure to do this over top a sheet of plastic wrap. Gently tap the bottom and sides of the measuring cup until the onigiri slides out. Optional: Add a strip of nori seaweed to the base of your onigiri. Wrap fully in plastic wrap.
- Repeat Steps 1 – 4 to make remaining onigiri.
Grilling the Onigiri:
- Heat a non-stick frying pan over medium heat. Coat the pan well with neutral flavored cooking oil.
- Add onigiri to the pan and cook on both sides until the rice becomes a nice, crispy golden brown color.
- Optional: For extra decadence, top each onigiri with a fried egg (ideally with a runny yolk).
Notes
- I recommend allowing your freshly formed onigiri to sit in the fridge for at least a few hours, if not overnight, before grilling – the hardened rice makes for a better grilling surface. In fact, yaki onigiri is a great way to use up leftover rice, or to revive onigiri that’s become too hard from sitting in the fridge!
- You can also lightly coat each onigiri in soy sauce before removing them from the pan; just grill for an additional few minutes on each side, being careful that the soy sauce doesn’t burn.
- Additional toppings that would also be mouthwatering on these onigiri: toasted sesame seeds, gomashio (sesame salt), fried shiso leaves, minced fresh basil or shiso, extra roasted tomato filling slathered on top, or a drizzle of sriracha.

Share This Bento!
Spread the bento love to your friends & family ~