
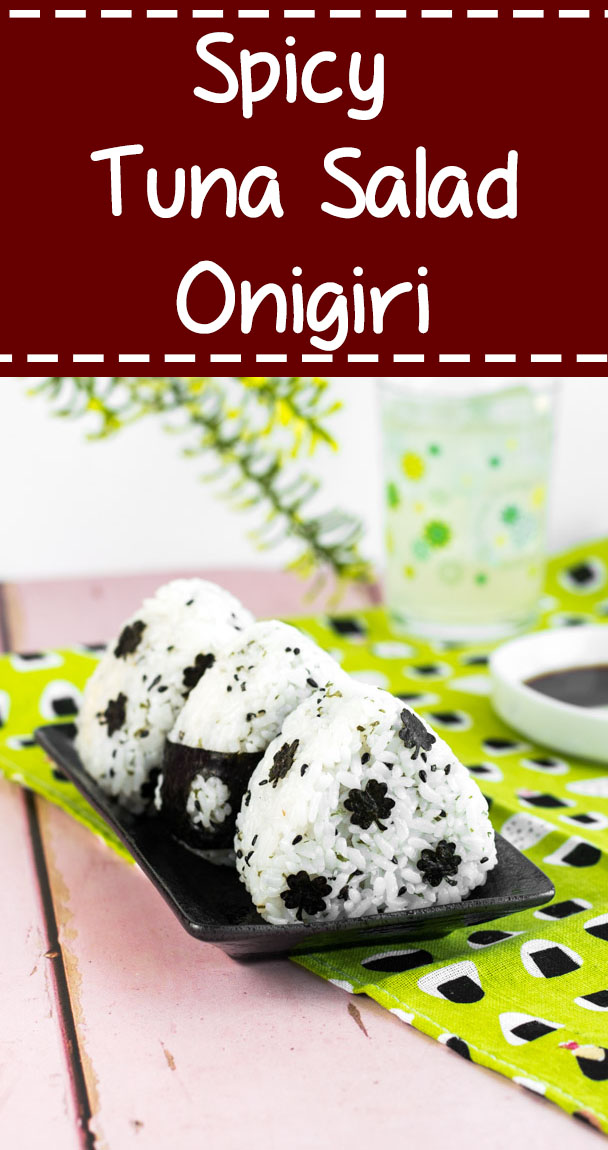
It’s time for Monthly Onigiri! For September, we’re making spicy tuna salad rice balls.
Step aside sandwiches, because tuna salad has a new BFF: onigiri. Seriously guys, rice + tuna salad is like a match made in heaven. The rice acts as the perfect vessel for sealing in all that creamy tuna goodness (hello mess-free lunch!), and the very inner layer of rice becomes decadently moist and creamy from the mayo – much better than eating soggy white bread, in my opinion.
But tuna salad can get a little, how shall I put it? Boring. (I apologize in advance to all you hardcore tuna salad connoisseurs.) But since we want onigiri that packs a serious flavor punch, I’ve given tuna salad a wee little makeover, one that requires only one simple ingredient: sriracha.
If you’re not a fan of spicy food, then feel free to skip the sriracha. But I mean, who doesn’t love sriracha? It just has this inexplicable addictive quality to it that seems to make everything it touches that much better. It’s like the food world’s fairy godmother. It transforms food into a hipper version of itself, all with one little squirt of the bottle.
Watch how to make Spicy Tuna Salad Onigiri (40 sec):
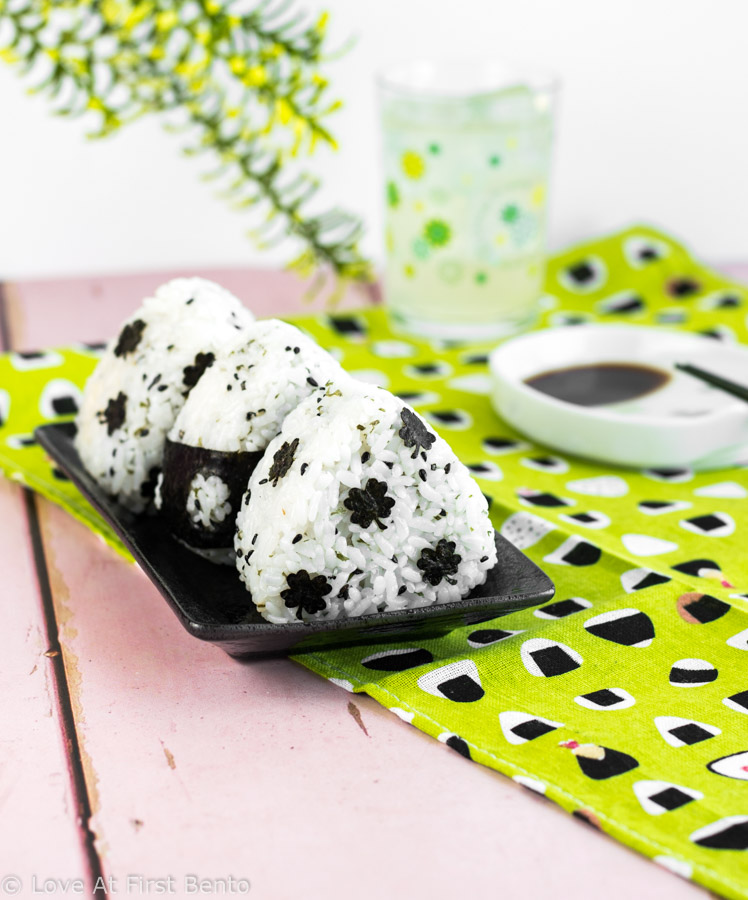
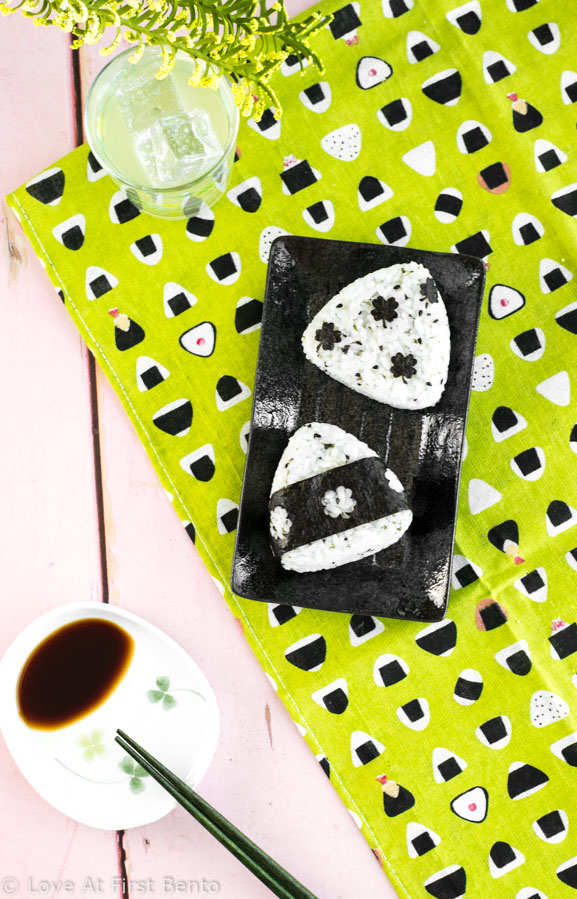
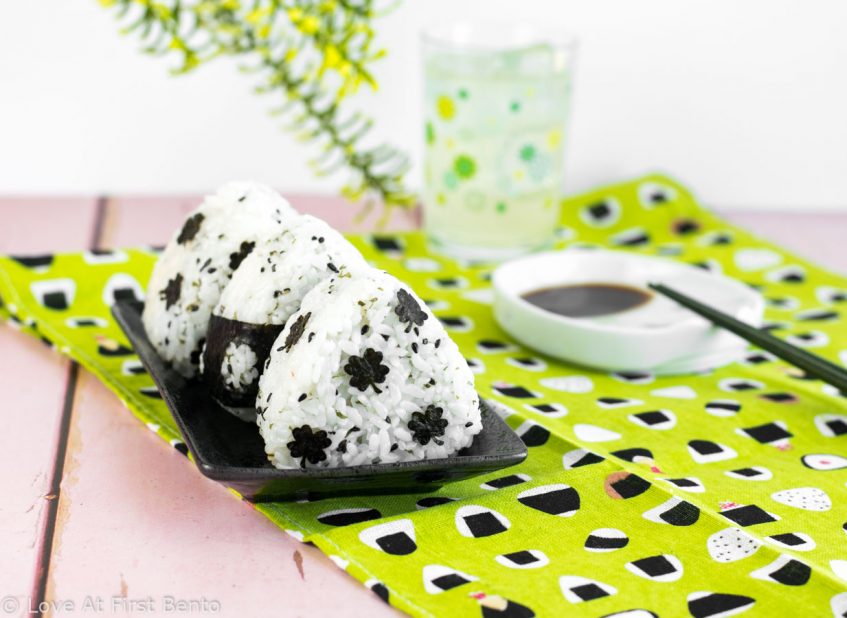
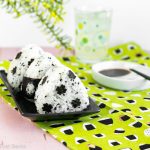
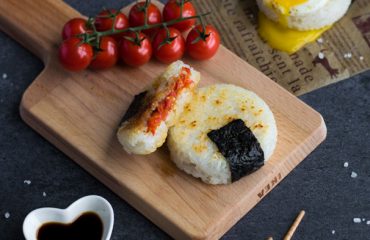
The rice for these onigiri is mixed with some black sesame seeds and parsley, and then decorated with cute little 4 leaf clover nori cutouts, just because, you know, I can’t help but try and make everything I touch as cute as possible. You can feel free to decorate these onigiri with any type of nori decorations, or even just leave them off completely and let the sesame-parsley rice do all the talking. Either way, you’ve got an eye-pleasing bundle of rice that’s ready to imbue your mouth with endless amounts of epic spicy flavor.
So, kick things up a notch with spicy tuna salad onigiri! They are serious little flavor bombs just waiting to be loved and devoured and packed into your next bento box.
Spicy Tuna Salad Onigiri

 Category: Onigiri
 Cuisine: Japanese
Description
Spicy Tuna Salad Onigiri are made extra delicious thanks to one secret ingredient: sriracha! Made from common pantry & fridge ingredients + easily shaped using a rice mold, these lusciously spicy rice balls are sure to be your newest lunch BFF!
Ingredients
Food Items:
- Japanese short-grain rice, cooked
- Black sesame seeds
- Parsley (either dried or finely minced fresh)
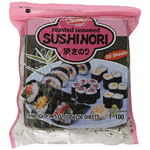
- Nori seaweed (optional)
Spicy Tuna Salad (makes enough for ~ 4 – 6 onigiri):
- 3.5 oz can tuna
- 1 tablespoon mayonnaise
- 1/2 tablespoon sriracha (add more or less depending on how spicy you like it!)
- 1/2 tablespoon lemon juice
- 1 teaspoon sweet pickle relish*
- Salt & pepper, to taste
Recommended Tools:
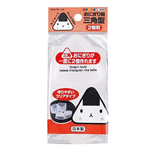
- Onigiri Mold
- Plastic wrap
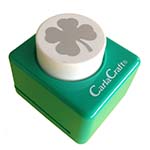
- 4 leaf clover craft punch (optional)
Instructions
Spicy Tuna Salad:
- In a bowl, add (drained) tuna, mayonnaise, sriracha, lemon juice, relish, salt, and pepper. Mix until well combined, then set aside.
Rice:
- In a bowl, add warm sushi rice. Sprinkle black sesame seeds and parsley over top the rice, then mix with a rice paddle or spoon until evenly incorporated. Feel free to add more of either, until you see sesame seeds and parsley evenly dispersed throughout the rice. Set aside.
Decorations (optional):
- Take a sheet of nori, and cut it into 9 cm x 3 cm rectangular strips – only cut as many as you’d like for decorating.
- With the 4 leaf clover craft punch, punch out about 5 clover shapes from the nori strip, working your way across the strip until you reach the end. Try your best to evenly space each clover cutout and keep them centered.
- Reserve the individual clover nori cutouts for decorating. Set strips and cutouts aside.
Assembly:
- With a damp paper towel, wipe the inside of your onigiri mold until it’s completely damp.
- Using a rice paddle or spoon, fill your mold just below the halfway point with warm rice. Make sure you press the rice gently but firmly into all the crevices.
- With the handle of your rice paddle or spoon, make a small indentation in the center of your rice, just deep enough to hold your filling.
- Spoon your spicy tuna salad filling into the indent. Be generous!
- Fill the rest of your mold with rice, until about the 3/4 point – you’ll need some room for the removable top piece to fit on top.
- Take the removable top piece and insert it into the mold. Push with gentle pressure until the top piece is fully inserted into the mold.
- Remove the top piece, and flip the rice mold over, making sure to do this over top of a plate covered in plastic wrap. If your rice mold has little push indents on the bottom, push it gently with your thumb, then gently tap the bottom and sides of the mold until the onigiri slides out.
- Optional: Decorate your onigiri by wrapping the nori strip with clover cutouts around the base, and/or randomly placing the individual nori clover cutouts atop the onigiri, on all sides.
Notes
- *I originally used capers (instead of relish) in this recipe. I’ve found that I prefer the relish, plus it’s more readily available in everyone’s fridge – for me, this makes it a better ingredient choice. However, feel free to use 1/2 tablespoon of capers (as in the original recipe), if you’d prefer.
© Love At First Bento. All images and content on this site are copyright protected. Please do not use any image without my prior permission. If you’d like to share this recipe on your own site, you are required to (1) link back to this post and (2) rewrite any instructions in your own words.


Comments (4)
Your photos are beautiful! This looks delicious, I cant wait to try it. Thanks for sharing Shannon!
★★★★★
Thank you so much for the lovely comment! Always happy to share ideas 😀
Easy and really great recipe!
★★★★★
Thank you so much Victor – I’m so glad you enjoyed the recipe! 🙂