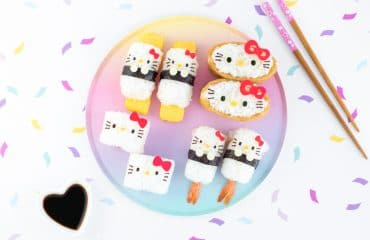
Celebrate Easter Rilakkuma style, with this adorable Rilakkuma Easter Bento! Featuring both Rilakkuma & Kiiroitori dressed up as bunnies, this springtime bento is the perfect Easter surprise for fans of all ages!
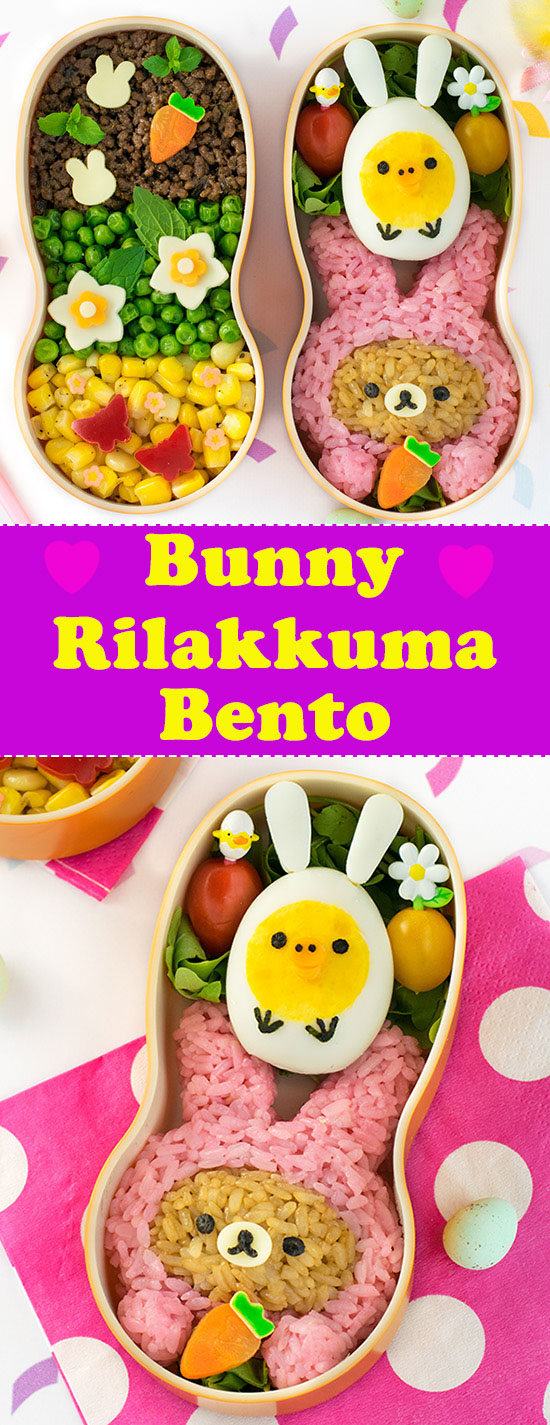
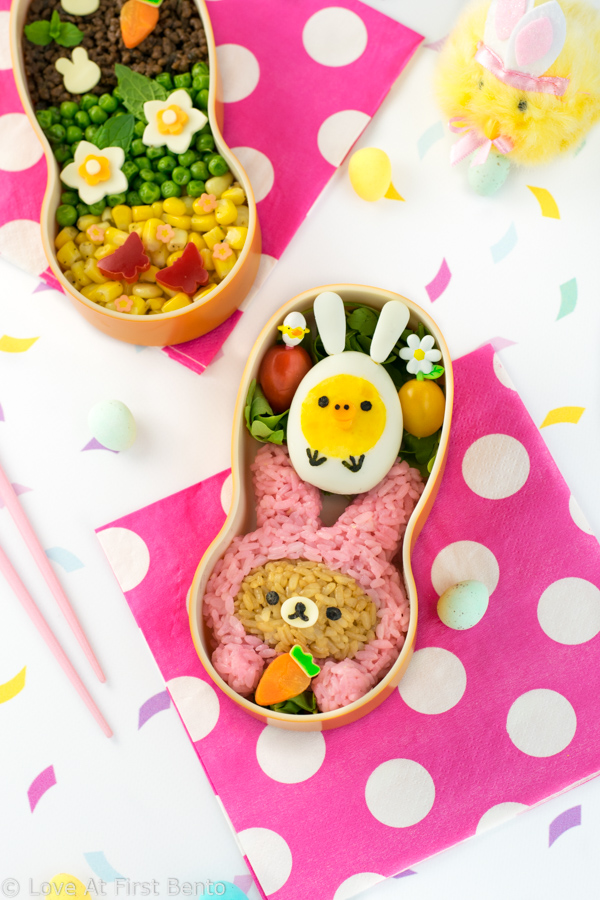
Happy Easter fellow bento lovers! How else would we celebrate here on LAFB but with an irresistible Easter bento box? 😀 This year the Easter Bunny’s brought us an adorable Rilakkuma Easter bento! Because, let’s face it: Rilakkuma dressed up as a bunny is pretty much the cutest thing ever. And don’t forget about Kiiroitori, who’s also joining the celebration sporting his own hard-boiled egg bunny suit. I know, I know, just when you thought Easter couldn’t get any cuter.
For me, Easter always reminds me of Easter egg hunts with my sister. You see, rather than growing out of the traditional Easter egg hunts like normal children do, we continued them (because, you know, why willingly give up finding chocolate?), and each year they became progressively more and more competitive as we tried to claim supremacy in finding the most eggs. Needless to say, my dad had to get pretty clever with his egg hiding, and eventually “Hello Kitty Eggs” were even thrown into the mix; these revered eggs, we decided, were worth 2 points each, and were typically stuffed with more candy than you’d think could possibly fit inside. I am quite proud to proclaim that I am by far the reigning Easter egg hunt champ – I’m pretty sure my sister has only won once, after all these years (though she’ll probably profess otherwise). Unfortunately, we aren’t together this Easter to perform one of our cyclonic egg hunts, so, since my sister is a HUGE Rilakkuma fan, I decided to make this Rilakkuma Easter bento instead. (Consider it a peace offering for all the years I’ve beat her 😉 )
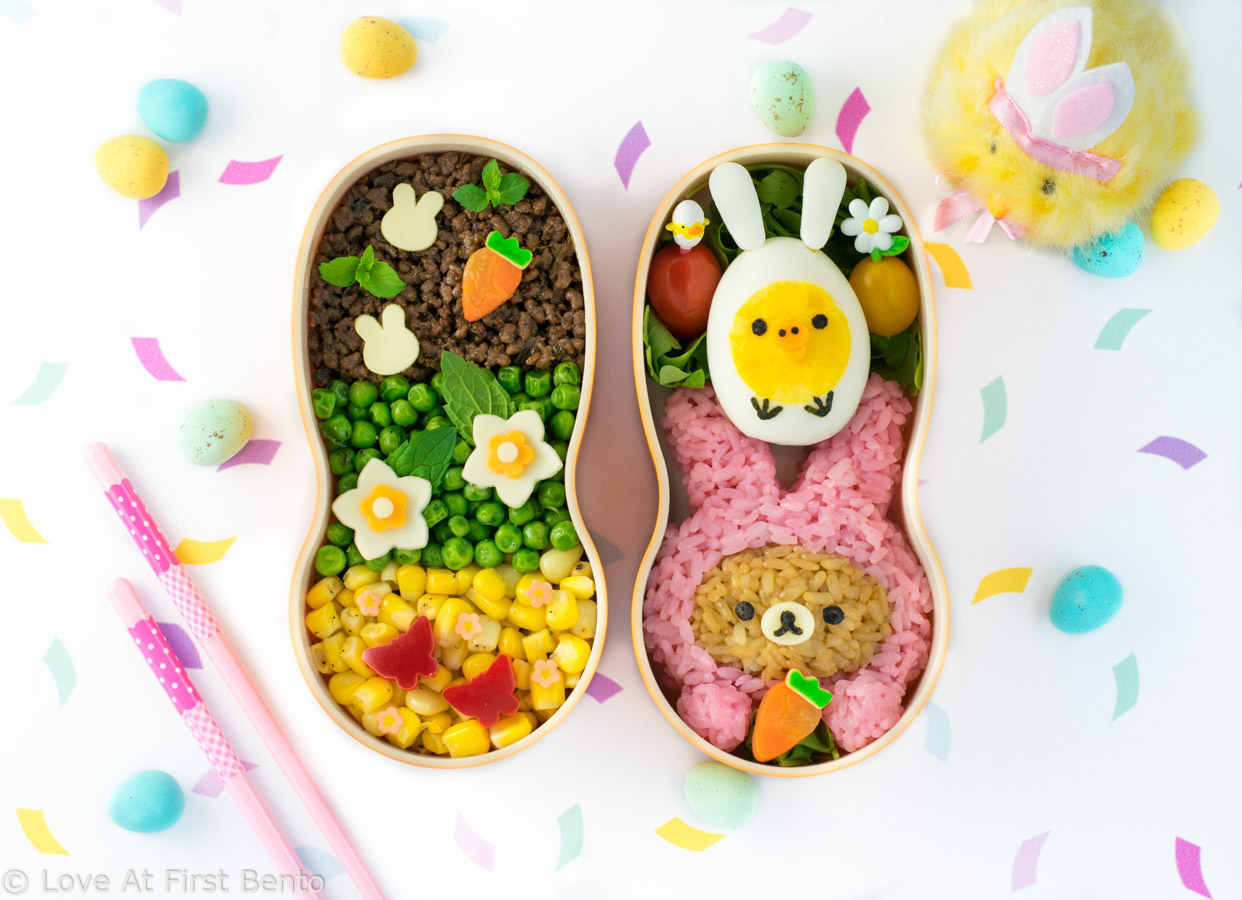
To make Bunny Rilakkuma, I used two onigiri molds to help make the rice molding a wee bit easier. First, I filled the Rilakkuma onigiri mold with soy sauce-dyed rice, in order to form a small Rilakkuma face. Since the face will be going into the bunny suit, you don’t need to worry about filling up the ear portion of the mold, and you only have to fill the mold just under halfway full (since we don’t want the face to be too bulky). Next, I used a rabbit onigiri mold to form the bunny suit portion, which I filled fully with pink rice that had been naturally dyed using beet powder. To complete Bunny Rilakkuma, make an indent in the center of the bunny head, place your Rilakkuma head into it, and TADA! Rilakkuma is ready to hop right on down the bunny trail.
I made Bunny Kiiroitori from a whole hard-boiled chicken egg, but feel free to use a hard-boiled quail egg instead. My trick to getting perfectly cooked eggs each and every time is using this (adorable) egg timer – I seriously never boil eggs without it. As for the color of the “bunny suit”, I chose to keep it white, but feel free to try dying the egg – I’m thinking pink, blue, or yellow would all look fantastic. Check out my Egg Decorating Guide for instructions on how to naturally dye hard-boiled eggs all sorts of fun colors.

I really wanted this whole bento box to be a fun springtime lunch, so I made a “spring” version of tri-color soboro for the second tier of my bento, consisting of meat soboro, minted peas, and buttered corn. I decorated these side dishes with a variety of cute, Easter-themed decorations, which included:
- White cheese bunnies, made using this bunny head food cutter.
- Mini carrots, made from carrots (ingenious, I know) and white cheese that had been colored green with an edible food marker. The cutter I used came with the rabbit onigiri mold (the same one used to make Rilakkuma’s bunny suit).
- Daffodils, made from orange & white cheese, and cut using these flower cutters and this mini circle cutter. Since I placed them on top of the minted peas, I used fresh mint to act as the leaves.
- Red pepper butterflies, made using a mini butterfly cutter. I also added a few flower furikake pieces atop the buttered corn, so it’d look like the butterflies were in a flower field.
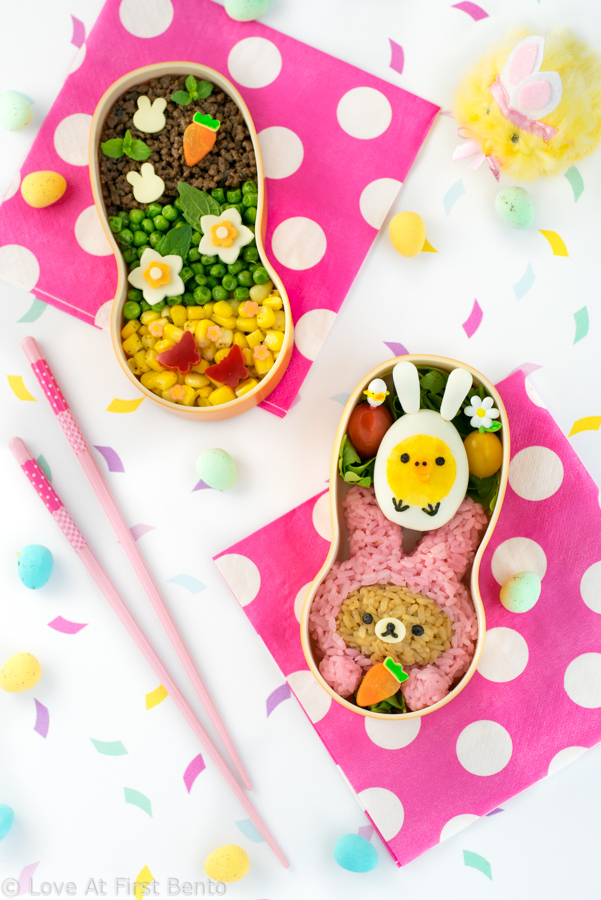
The bento box I chose was this adorable Matryoshka bento box, kindly provided by Lunch à porter. I found that the bento’s unique shape worked perfectly with the shape of Bunny Rilakkuma, and I really loved the look and shape it gave to the tri-color soboro as well. Talk about a perfect fit!
So celebrate Easter Rilakkuma style, by making this cute Rilakkuma Easter bento! It makes for the perfect Easter surprise, and is sure to delight Rilakkuma fans of all ages. And I mean, even if it isn’t Easter, I’m pretty sure no one could pass up such edible cuteness, making this a bento that can truly be enjoyed year-round.
Bunny Rilakkuma Easter Bento

 Yield: 1 Bunny Rilakkuma & Kiiroitori
 Category: Character Bento
Description
Learn how to make this adorable Rilakkuma Easter bento, featuring Rilakkuma & Kiiroitori dressed up as bunnies! Using naturally dyed rice, onigiri molds, and hard-boiled eggs, you too can create this springtime bento that’s perfect for Rilakkuma fans of all ages!
Ingredients
Bunny Rilakkuma:
- ~ 3/4 cups cooked Japanese short-grain rice, divided into 1/4 cup and 1/2 cup portions
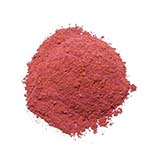
- 1/8 teaspoon beet powder
- 1/2 teaspoon soy sauce
- Nori seaweed
- White cheese
- 1 uncooked spaghetti noodle
- 1 carrot slice (optional)
- Edible green food marker (optional)
Bunny Kiiroitori:
- 2 hard-boiled eggs
- Mayonnaise
- Orange cheese
- Nori seaweed
- 1 uncooked spaghetti noodle
Recommended Tools:
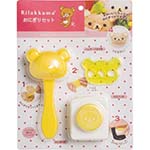
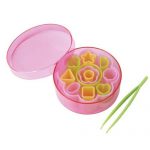
- Rilakkuma onigiri mold
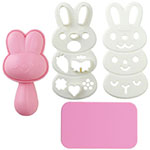
- Rabbit onigiri mold
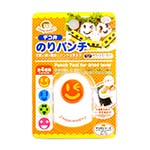
- Rilakkuma nori punch
- Rilakkuma facial feature cutter
- Small circle food cutter (~3 cm)
- Small oval food cutter (~2 cm)
- Plastic wrap
- Winking face nori punch (optional)
- Rabbit food cutter (comes with rabbit onigiri mold) (optional)
Instructions
Bunny Rilakkuma:
- Using the Rilakkuma nori punch, punch out the full design from the nori seaweed. Reserve the nori eyes and nose/mouth.
- Using the Rilakkuma facial feature cutter, cut out one oval from the white cheese – this will become the white part of Rilakkuma’s face.
- Pink Rice: In a small bowl, mix beet powder with 1/2 tablespoon warm water until dissolved. Feel free to add more beet powder as needed to achieve desired color. Add your homemade pink dye to the 1/2 cup portion of warm rice, and mix until rice becomes evenly pink in color.
- Brown Rice: Add soy sauce to the 1/4 cup portion of warm rice, and mix until rice is evenly brown in color. Feel free to add a little more soy sauce if needed.
- Wet the Rilakkuma rice mold with a damp paper towel, and fill with the brown rice. Note that you only have to fill the mold just under halfway full, and that you can leave the ears completely empty (since we only need the face). Press the rice firmly into the face portion of the mold using the back of a rice paddle or chopstick. Flip the mold upside down over top a sheet of plastic wrap, and gently tap until the shaped rice slides out. Wrap in plastic wrap and smooth out the edges of the face as needed.
- Wet the rabbit rice mold with a damp paper towel, and fill with the pink rice (reserve about 1 tablespoon of it for the paws). Place the insertable push piece on top, press down on the rice, and remove. Flip the mold upside down over top a sheet of plastic wrap, and gently tap until the shaped rice slides out.
- Add half of the remaining pink rice to a small square of plastic wrap, and wrap completely. Begin forming a tiny ball by squishing the rice together and then rolling it around in the palm of your hand or between your fingers. Once smooth, wrap in plastic wrap and repeat with remaining pink rice to create a second paw.
- Using either the back of a rice paddle or your clean, damp hands, gently form an indent in the middle of the bunny face, where Rilakkuma’s head will go. Aim to make the indent the same size and depth as the Rilakkuma head. Place the Rilakkuma head into the indent, and press it down and smooth out the surrounding rice as necessary, until it looks as if Rilakkuma is wearing a bunny costume (it’s okay if the head sticks out a tiny bit).
- Optional: Wrap the entire Rilakkuma bunny head in plastic wrap, and, using your finger(s), carefully separate the two bunny ears until there is a bit of space in between them.
- Using tweezers, apply the white cheese oval onto the middle of Rilakkuma’s face. (Feel free to use a little honey or mayo to help it stick better.) Add the nori eyes on either side of the cheese oval, and the nori nose/mouth right on top of the cheese oval. I recommend looking at a Rilakkuma picture for reference as you decorate.
- Break off two small pieces from the uncooked spaghetti noodle, and insert one into each pink rice paw. Place the two rice paws at the bottom of the bunny suit, close to the middle, and gently push them into the rice like you would a pushpin. (Here’s a video demonstrating how to use spaghetti like an edible pushpin.)
- Optional: Using the carrot cutter located on the rabbit food cutter, cut out a single carrot from the carrot slice. Use the carrot top cutter (also located on the rabbit food cutter) to cut out a carrot top from white cheese. Color the cheese green using a green edible food marker. Place the colored green carrot top onto the orange carrot, then place the entire carrot in between Rilakkuma’s paws. You can use some leafy greens or small veggies to help prop it up from underneath.
Bunny Kiiroitori:
- Using the Rilakkuma nori punch, punch out the full design from the nori, reserving the nori eyes (you can discard the other pieces) – these will become Kiiroitori’s eyes.
- To make Kiioritori’s tiny nostrils, take a square or rectangular piece of nori and, using scissors, cut off the very tip of two corners. The nori pieces should resemble tiny dots. (See Recipe Notes for how to make the nostrils using a nori punch.)
- Using the Rilakkuma facial feature cutter, cut out 2 smalls ovals from the orange cheese – these will be used to make Kiiroitori’s beak. Using only half of the small oval cutter, cut one of the cheese ovals into a thin crescent moon shape – this will form the bottom portion of the beak.
- Optional: Using the winking face nori punch, punch out the full design twice from the nori, reserving the two “winking” eye pieces – these will become Kiiroitori’s feet.
- Using the small circle food cutter, carefully cut a shallow circle into the middle of one hard-boiled egg, making sure to only cut into the white portion. Remove the cutter, and gently peel the circular piece of egg white off – if done correctly, it should peel off cleanly, revealing the yolk.
- Cut the second hard-boiled egg in half, and scoop out the egg yolk into a small bowl (reserve the egg whites). Add a dollop of mayonnaise to the egg yolk, and mix and mash with a fork until a smooth yellow paste has formed. Feel free to add more mayo to achieve a smoother consistency.
- Using the small oval food cutter, cut out 2 ovals from the reserved hard-boiled egg whites – these will become the bunny ears for Kiiroitori’s bunny suit.
- Using a small spoon, carefully add the mashed egg yolk mixture into the circular “hole” you made in the first egg. Spread and smooth it out (either with a spoon, chopstick, or knife) until the entire “hole” is filled and looks like one solid yellow circle.
- Using tweezers, add the orange cheese “beak” to the middle of the egg yolk circle (place the oval cheese piece on top, and the crescent moon-shaped piece directly underneath it). Add the two nori “nostrils” on top of the oval piece. Place the nori eyes on either side of the beak. Optional: Place the nori feet onto the egg white portion just below the yellow yolk circle. I highly recommend using a Kiiroitori image as reference while you decorate.
- Break two small pieces off the uncooked spaghetti noodle, and carefully insert them into the bottom of each egg white “bunny ear”. Gently insert the “bunny ears” into the top of the Kiiroitori egg, pushing them in like you would a pushpin, until fully inserted and secure. (Here’s a video demonstrating how to use spaghetti like an edible pushpin.)
Notes
- If you have a tiny smiley face nori punch, the eyes make for great Kiiroitori nostrils.
- Here’s an easier version of the Bunny Kiiroitori egg: simply cut a hard-boiled egg in half, and add the ears and facial features to one of the halves. You’ll lose the 3D effect that using a full hard-boiled egg has, but it will still look great!
© Love At First Bento. All images and content on this site are copyright protected. Please do not use any image without my prior permission. If you’d like to share this recipe on your own site, you are required to (1) link back to this post and (2) rewrite any instructions in your own words.

![Vulpix Pikachu Bento Box - Pokemon fans will FLIP over this insanely adorable Pokemon bento, which features Pikachu dressed up as a Vulpix! 100% edible & perfect for decorating rice, this bento can easily be created by anyone thanks to my 'secret hack' for easily & accurately creating images out of food. Get the recipe at: loveatfirstbento.com [character bento, kyaraben, lunch]](https://loveatfirstbento.com/wp-content/uploads/2018/12/Vulpix-Pikachu-Bento-2-370x240.jpg?x21322)

Comments (12)
So cute!! I love the cute little chick on the egg! Happy Easter!
Thank you Kelly, Happy Easter to you as well! 😀
These are just adorable Shannon! You have made Rilakkuma into such a cute bunny! Nice to make for your sister. Thanks for sharing your amazing recipes!! Happy Easter!
★★★★★
Aww, thank you so much, I’m so glad you like it! 🙂 Hope you had a great Easter as well!
i love that there’s beet powder around these days! i was in a japanese summer camp as a kid and we definitely used too much food dye to make our rice cool. this would have been so much better (;
Ikr? It’s surprising how much color only a little amount can provide, and bonus points that it’s all natural. And Japanese summer camp sounds like the funnest thing ever – wish I had gone to one as a kid!
Love it!!?? I will only accept this peace offering if you make me one next time you’re here. And I’ve definitely won twice!!!!
★★★★★
Lol I’ll consider it… 😉 😉
Hi Shannon, OMG! This is soooooooooooo cute. I might just burst. Thank you for your lovely recipes. ❤️?
Aww thank you so much Hyeon, so glad you like it! 😀 <3
It’s a really good idea to use those rice mold ! It’s a little hard to mold rice in my opinion… And the rice sticks..!!!
Thank you! I totally agree, I prefer to use rice molds whenever I can, as it just makes things so much faster and easier 😛 And yes, omg, there’s nothing worse than having rice sticking to every part of your hands and arms – no thank you!