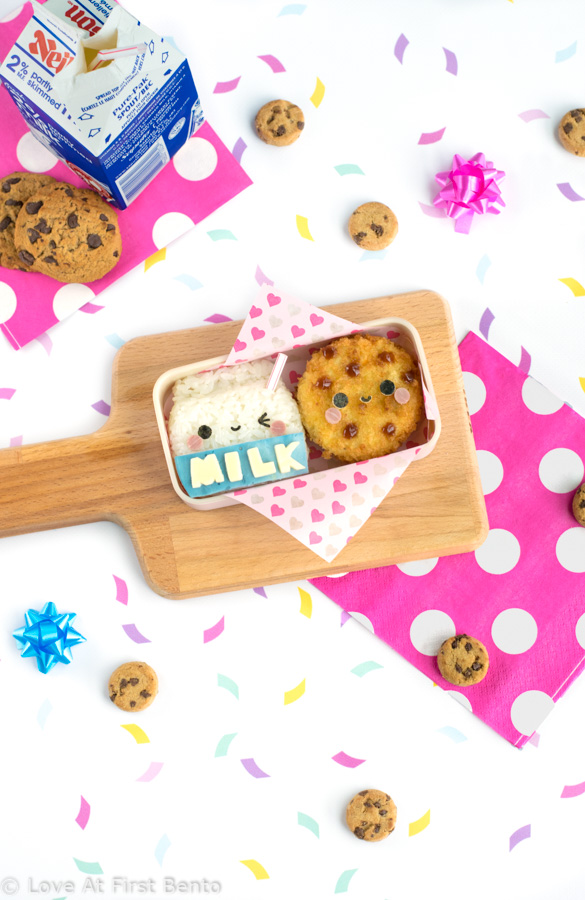
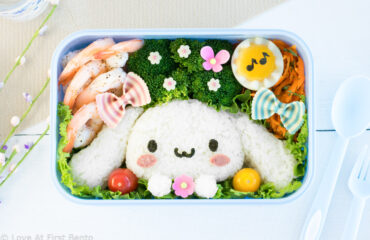
Take your lunch to all new levels of cute with this Milk & Cookies Bento Box! Plus, learn how to make all natural blue food dye from scratch (spoiler alert: it takes less than 10 seconds).
I don’t think there exists a person who doesn’t love milk and cookies. Is it even possible? I’m not sure our genetics allows for such an anomaly; it’s like evolution naturally selected for humankind’s fondness of this nostalgic childhood treat. But no amount of evolution could prepare you for the cuteness that is this milk & cookies bento box – it’s cuteness of the highest, most lethal order, and it will melt your brain into a puddle of disabled neurons. (And that itty bitty little straw sticking out of the milk = finishing blow. Totally KO’d.)
This bento is for all of you who’ve ever dreamed of having milk and cookies for lunch (or breakfast, or supper). It’s for all of you who’d rather skip the healthy stuff and go straight for dessert. Know someone who needs a little cheering up? This bento will for sure do the trick. And for any of you rare entities out there who don’t like milk and cookies *cue gasps of horror*, I am almost 100% certain that laying eyes on this bento box will convert you into a loyal devotee. This is but a mere taste of milk and cookies’ irresistible powers.
To make the “chocolate chip cookie” component of this milk and cookies bento, I used a homemade potato korokke patty (Japanese potato croquette), which provided the perfect golden brown backdrop. My absolute favorite korokke recipe comes from Namiko Chen of Just One Cookbook – I highly recommend you give it a try! It’s the perfect combination of crispy deep-fried panko breadcrumbs surrounding a light, pillowy filling of mashed potato goodness. Transforming these golden korokke patties into “korokke cookies”, however, involves two key steps:
- When making your korokke, shape the potato mixture into small, circular discs – this ensures your “cookies” will be round. Make sure they’re small enough to fit inside your bento box as well.
- Add “chocolate chips” to your korokke cookie by adding little dollops of tonkatsu sauce to the surface. I used a mini squeeze bottle for this, but you can also apply them using the back of a chopstick or a small spoon.
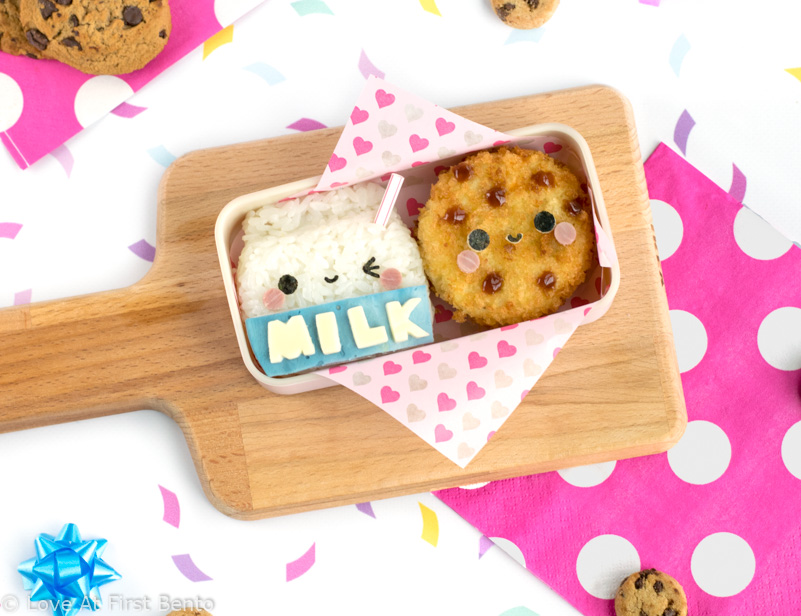
Next up, we have our cute little milk carton made from rice. And CHEAT ALERT: we’re going to use a tupperware container to shape the rice! I used one of those tiny 6×6 cm containers, and it worked like a charm. The only key steps to ensuring success are a) making sure the container is nice and wet, and b) pressing down that rice to fill up all the nooks and crannies. If you don’t have any small-sized containers, try using a bigger one and only filling up one corner of it with rice – just be sure to smooth and pat down the top and edges thoroughly, until you’re left with a nice square shape.
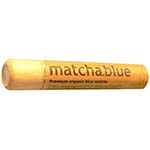
The other mystery surrounding our milk is that blue label – which, btw, is actually just chicken ham that’s been soaked in blue food dye. Making an all natural, homemade blue food dye is actually surprisingly simple: just combine water with this Blue Matcha powder from Bluechai – my favorite ingredient for dying all things blue, as it’s 100% natural, 100% vegetarian, and also doubles as a yummy tea blend! As a special reader bonus, use the discount code “loveatfirstbento” at checkout to receive 10% off your order. <3
Watch how to make Milk & Cookies Bento Box (60 sec):
So, we’ve unraveled the mysteries behind our savory milk and cookies: now how do we go about making them cute enough to cause cardiac arrest? Here are my best tips for making ANY food debilitatingly adorable:
- Go for big eyes, tiny mouth.
- Keep the mouth on the same horizontal plane as the eyes (rather than placing it below the eyes).
- Add rosy cheeks – they have an instant cute boosting effect, and can be made from ham, ketchup, imitation crab, or salami. Bonus points if you place the cheeks so that they just touch the outside edge of the eyes.
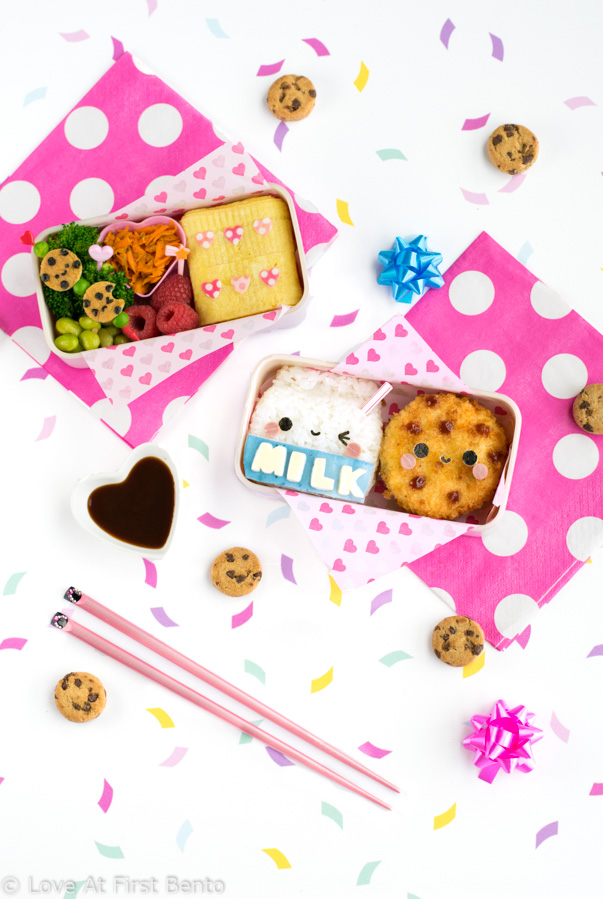
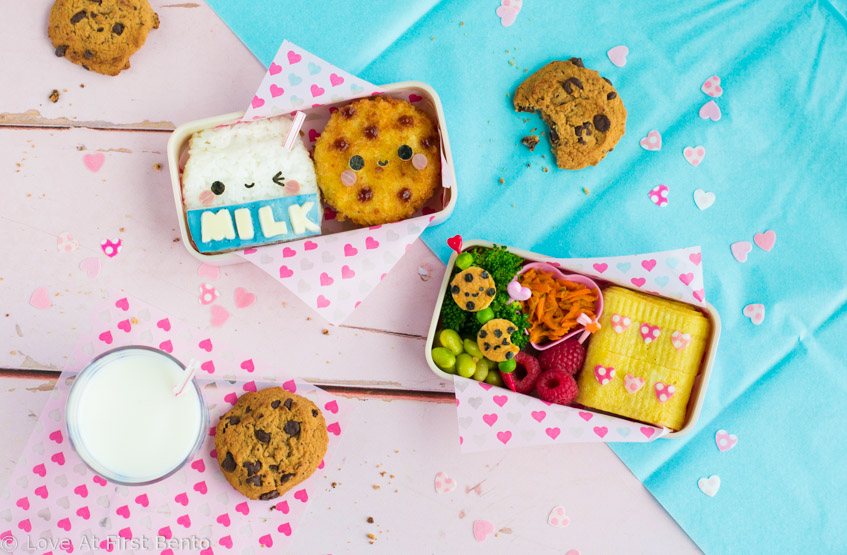
To accompany my milk & cookies bento box, I have a second tier filled with spicy garlic edamame, steamed broccoli, tamagoyaki (topped with wafer heart sprinkles), carrot salad, fresh raspberries, and a cute “cookie” food pick (find out how to make this in the Recipe Notes below). I also recommend packing extra tonkatsu sauce on the side, since smothering your korokke in it is a necessity.
So, while there may not be any real milk and cookies in this bento box, there’s more than enough cuteness to make up for that. Treat yourself, and have some “milk and cookies” for your next lunch – it’s sure to be the perfect precursor for the actual milk and cookies that are bound to be dessert. 😉
PS: If you’re wondering how many cookies I ate while shooting this bento, it was at least a whole box. I regret nothing.
Milk & Cookies Bento Box

 Yield: 1 Bento
 Category: Cute Bento
Description
Step-by-step instructions for turning rice and korokke (potato croquette) into an ADORABLE milk & cookies bento box! Plus, easily shape rice into a milk carton shape with a common kitchen item found in every household.
Ingredients
Food Items:
- 1 cooked potato korokke patty (recipe I used can be found here)
- 1/4 – 1/2 cup cooked Japanese short-grain rice
- Nori seaweed
- 1 slice chicken ham or turkey ham
- 1 slice regular pink ham
- White cheese (such as swiss, provolone, or white Kraft Singles)
- 1 – 2 teaspoons Blue Matcha powder
- Tonkatsu sauce (such as Bull Dog brand)
Recommended Tools:
- Small 6×6 cm tupperware container
- Smiley face nori punch
- Cat face nori punch (that comes with this cat onigiri mold kit)
- Small circle food cutter
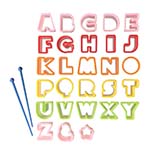
- Alphabet food cutters (letters M, I, L, and K)
- Winking face nori punch (optional)
- Drinking straw
- Plastic wrap
Instructions
Decorations:
- Place the chicken ham in a glass bowl, and pour enough warm water over top to cover it fully. Add the Blue Matcha powder and mix. Allow the ham to sit in the blue dye for a minimum of 15 minutes – the longer it sits in the dye, the darker blue it will become. Feel free to add more Blue Matcha powder if the color doesn’t seem dark enough.
- Using the smiley face nori punch, punch out the full design from the nori. Reserve the two curved eyes – these will become the tiny mouths for the milk and the cookie.
- Using the cat face nori punch, punch out two sets of eyes from the nori. Make sure you punch these out using the rubber mat the kit comes with.
- Optional: Using the winking face nori punch, punch out the full design from the nori. Reserve the “winking eye” – this will become the milk’s winking eye.
- Using the small circle cutter, cut out 4 circles from the pink ham – these will become the rosy cheeks.
- Using the alphabet cutters, cut out an M, I, L, and K shape from the white cheese.
- Once your chicken ham has turned blue, take it out of the dye and cut it into a rectangular strip with a knife. The length of the strip should be equivalent to the length of the tupperware container you will use to mold your rice, and the height should be tall enough to fit the cheese letters.
- Take the drinking straw and cut off a 3 cm length piece – this will become the milk’s mini straw.
Milk Carton:
- Take your tupperware container and wet it thoroughly with a damp paper towel. Fill the container until full with warm sushi rice, patting down the top with the back of a rice paddle or spoon until it’s flat. Turn container upside down over a sheet of plastic wrap, tapping the bottom and gently shaking until the rice slides out.
- Wrap the rice square fully in plastic wrap. Begin by flattening the square with the palm of your hand – we want a chubby milk carton, after all (because chubby = cute). Smooth out the edges so that they remain straight. Next, take your index finger and press down horizontally across the top edge of the rice square – this will become the milk carton’s flap. Rub your finger back and forth gently across the rice, until desired shape is achieved. To further delineate the flap from the rest of the milk carton, press down with your fingertip into the crease that has now formed to further define it. Lastly, press the top two corners in towards the center using your fingers, gently pushing inwards and rubbing upwards – this step ensures the top edge of the milk carton is slightly shorter in length than the bottom edge, which gives the milk a slightly more 3D effect. <– For a complete visual demo of the rice molding, refer to the video tutorial
- With your rice milk carton lying on a flat surface, apply the strip of blue ham across the very bottom of the milk carton using tweezers or chopsticks. Feel free to coat the back with some mayo or honey to help it stick better.
- Using tweezers, place the cheese letters on top of the blue ham strip so that they spell MILK. Feel free to use some mayo or honey to help them stick better.
- Using tweezers, apply the nori eyes and mouth just above the MILK label. If you have the optional winking nori eye, apply this in place of one eye.
- Using tweezers, apply the rosy ham cheeks, placing them just under the outer edge of each eye. Feel free to use some mayo or honey to help them stick better.
- Take a chopstick and make a small indent near the top right corner of the milk carton (not the flap portion). Stick the 3 cm straw into the indent, pushing it in lightly until secure.
Chocolate Chip Cookie:
- With the korokke patty lying on a flat surface, apply the nori eyes and mouth using tweezers. Feel free to use some mayo or honey to help them stick better.
- Using tweezers, apply the rosy ham cheeks, placing them just under the outer edge of each eye. Feel free to use some mayo or honey to help them stick better.
- Using a small squeeze bottle, the back end of a chopstick, or a spoon, apply small circles of tonkatsu sauce randomly on top of the korokke patty to form the “chocolate chips”.
Notes
- To make the cookie food pick, you will need aburaage, nori, and peas. Cut the aburaage into small circles using a circle cutter (I only made 2), then carefully skewer them onto your pick, inserting peas in between. Punch out tiny faces and “chocolate chip” circles from the nori (I recommend this punch for the face and this punch for the circles), then apply them to the aburaage circles with tweezers. If you’d like for one cookie to have a “bite” taken out of it, take your circle cutter and use it to cut off a little piece from one side.
© Love At First Bento. All images and content on this site are copyright protected. Please do not use any image without my prior permission. If you’d like to share this recipe on your own site, you are required to (1) link back to this post and (2) rewrite any instructions in your own words.
Tools used to make this bento:


DISCLAIMER: This page contains affiliate links. If you make a purchase through one of these links, I will earn a small commission (at no extra cost to you!), which helps to keep this site running. Thank you for supporting Love At First Bento!


Comments (8)
Your pictures are amazing and what a really cool idea! Who doesn’t love milk and cookies?
Thanks so much Vivian! And ikr? Just talking about it right now is making me want to go get some (and I think I just might…) 😛
These are SUPER cute! I’m going to keep this in mind for when my little is old enough to appreciate it! Also, blue matcha?! Buying some RN.
Thank you Lauren, that’s so exciting for me to hear – I think kids would absolutely LOVE this bento box! And you will love the Blue Matcha, it’s seriously a game changer 😀
This is the cutest! I’ve always loved bento boxes and now I have you to help. Maybe I’ll try this soon.
★★★★★
Thanks so much Melody, so glad this inspired you to give bento boxes a go – they can sometimes be intimidating, but I’m always here to help make things a little more approachable (and more fun!) 😉
THIS IS SO CUTE!! I for one LOVE milk and cookies, of course! Hehe. In fact I was thinking of going as a carton of milk for Halloween, haha. Only because I have a big box. Your site is so kawaii!
Yaaas, a fellow milk & cookies lover! *virtual high-five* That actually sounds like a really cute costume idea – you should do it, and then find someone to go with you and be a cookie, hehe! 😛 Although your “Ultraman-ish villain” costume sounds cool too 😉
And aww, thanks so much Lyndsay! <3